Monthly Archives: June 2011

Produce bags—yay or nay?

Standard

Photobucket

My little garden has been quite the little producer. Here’s a shot after a heavy round of harvesting. I took away about two-thirds of those big leafy greens on the right and it still looks abundant, doesn’t it? Amazing.

With all this production I’ve had to quickly come up to speed on preservation strategies. For super abundant crops like the turnip and beet greens I blanch, vacuum pack and freeze a little more than half of the harvest. I’m always shocked that it ends up being about 10 percent of the original volume. On the other hand, those little bricks of vacuum-packed green don’t overwhelm my freezer either and that’s a good thing considering that it’s currently full of 40 pounds of elk meat.

For other crops like lettuce, mesclun, and chard I wash, dry and wrap them in paper towels for storage in the fridge.

Here’s what my fridge look like right now:

Read the rest of this entry

It’s raining radishes

Standard

Photobucket

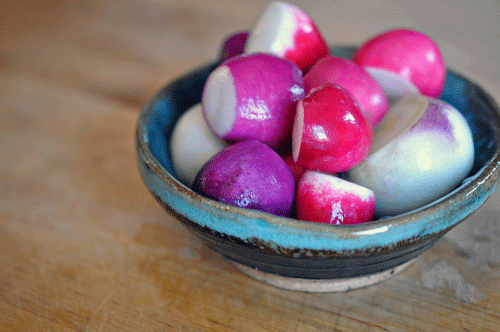
My little garden has been producing radishes like crazy. Seriously, they’re coming out my ears! For the past six weeks I’ve been cooking with radishes every day. Prior to this I was not a huge fan of radishes. I basically grew them for Jack because he likes them so much. However, as soon as harvest started he bolted for Alaska and left me alone with buckets and buckets of these things. With a little experimentation I have grown to love these dudes. Plus, they’re a diuretic. What woman doesn’t love that? And they’re big on the prevention of scurvy. Yeah, no scurvy in this household anytime soon.

Sometimes I saute them in a little butter and add them to stir fry greens or maybe a pasta with mushrooms and garlic. Sometimes I slice them into a salad. Sometimes I just dip them in hummus for a yummy crudite. I have even added them to pizza. Yes, I said pizza. It was actually very good.

This ridiculously easy salad has become one of my favorites and the combination can be done in two ways: as a green salad topping or as a chopped slaw.

Ladies and gents, please welcome the Radish and Granny Smith Apple Salad/Slaw. Yaaaayyyyy! Waaahhhh! (the crowd screams).

It’s super simple; there are only two ingredients plus a dressing. It’s really flavorful, crunchy, watery and fresh tasting for these hot summer days. I hope you enjoy this combo as much as I do. Enjoy!

Photobucket

Radish and Granny Smith Apple Salad/Slaw

2-3 radishes
1 Granny Smith apple
2T your favorite poppy seed dressing
fresh ground black pepper to taste

1. Thinly slice (or chop) the radishes and Granny Smith apples so that they are the same size. If I’m adding it to a salad I slice them paper thin. If I’m making a slaw I chop them into little 1/4-inch chunks to give them more weight.

2. Drizzle your favorite poppyseed dressing and crank some fresh black pepper on top. Mix.

3. If you’re making a slaw, you’re done. If you’re making a salad, just add the mix to some lettuce and toss.

4. Optional: Top with some julienned lemon verbena if you have it. The lemony freshness gives an awesome pop.

A day away

Standard

Photobucket

It’s been my mission this year to get us out and about regularly and on the cheap, of course. It’s so easy for us to get caught up working on the house, school, normal life crap … I have to consciously plan days away just for fun.

Jack’s been up in Alaska for the last couple of weeks. When he’s up there he works pretty much non-stop so I knew he was going to be tired when he got home. I also knew that he wanted to start working on the backyard as soon as possible, which knowing him the way I do was simply going to prolong the exhaustion. To eliminate temptation I decided to remove him from the premises entirely. I whisked us off to San Francisco to spend the day in Golden Gate Park visiting exhibitions. It was going to be a no stress, no work, lazy, lazy day. Plus, I knew it was going to be my last chance this summer to get us out doing something fun before he takes off for Alaska again.

Our first stop …

Read the rest of this entry

Scraps

Standard

Photobucket

A couple years ago I switched wallet styles from a large leather checkbook-style wallet to a little coin purse-like zipper bag that just fits my credit cards and some cash. I stopped carrying a checkbook ages ago. Since the switch I’ve never looked back. I love the ease and convenience of a compact wallet, which I can toss into a purse or just tuck into my pocket.

Recently my wallet’s zipper gave up the ghost, so I’ve been prowling for a new one. There are so many options out there …

One of the cutest was this adorable Vera Bradley at Barnes & Noble.
Photobucket

I’m attracted to the bright colorful designs.

There were plenty of cute compact styles, but in the end I preferred the simplest little coin purses.

Photobucket

I hemmed and hawed over them for awhile. I liked ’em, but I didn’t love ’em. They were a little too stiff, had some design features that I liked and some not so much.

And finally I absolutely was NOT going to pay $32 for a little coin purse. It just felt ridiculous. There are some things that are worth it. This wasn’t it.

So, I went home and sifted through my fabric scraps. I bought three 7-inch zippers for $1.79 each and a packet of pearl snaps for $1.99.

I sewed up three little zipper bags in various sizes ranging from “credit cards only” to “credit cards + phone + keys”.

Photobucket

I customized the interiors with a separate pocket for my driver’s license and main credit cards because I can never seem to find them easily when I’m standing in line at the checkout counter.

Photobucket

The outside pocket is the perfect place to tuck shopping receipts or business cards. The metallic in the fabric and the pearl snap detail add just enough panache for my girly-girl tastes.

For $8—and less than an hour’s investment—I got three custom zipper bags that can carry all sorts of things: money, makeup, my ipod + earphones … whatever.

Cool beans.

Thanks to Noodlehead for the zippy-wallet tutorial. I used her tutorial as a guideline and customized the sizes, pockets and interior details to suit my needs.

I’m so glad that I decided to try and use what I had. Sometimes that scrap pile can reap little treasures.

A new color, a new me

Standard

Photobucket

Source: Southern Living magazine
Photography: Laura Moss, Styling: Natasha Louise King , Article: Sandra S. Soria

I get Southern Living magazine thanks to my mother-in-law, Jeanne. (Thank you, Jeanne!) In the March issue was a story on a Charleston home re-do and this dining room stopped me in my tracks. I was arrested by the wall color. It’s grey, it’s blue, it’s neutral and yet not neutral. I loved it!

I dissected the design looking for the keys to its success. I kept staring at the photo, taking in the details, the color scheme, textures, mix of woods, the contrast of ivory crown moldings.

Hmmmm.

I actually had some of this already going on in my bedroom. And coincidentally this color is an accent color in the navy rug that used to belong to my mother-in-law, but now lies at the foot of our bed. I really like that rug and knew that it was going to somehow be a launching point for whatever color scheme I chose.

This color was it!

With the magazine still clutched in my craws I excitedly said to Jack, “I’m repainting the bedroom!” I flipped the magazine over to show him the picture and motioned with Vanna White swan like hand movements the beauty and grace of this awesome color.

He didn’t even look up, “Sure. Sounds good.”

God love this dude.

Read the rest of this entry

Cesar Chavez Park

Standard

Photobucket

I spent my last weekend before summer school with some girlfriends over on the peninsula. We did the typical girl stuff: mani-pedis, chatted, dinner, chat chat chatted, played Scrabble (I LOVE Scrabble!) at the local pub, chatted, swapped good books and went to see Bridesmaids. Snort. Snicker. Oh, Lordy … the food poisoning scene … . Help me, Rhonda! This isn’t really a spoiler but well, people get food poisoning. That’s all I’ll say. It’s gross. It’s super funny! Don’t watch it with a full bladder.

And I loved Melissa McCarthy in this film. When she came on screen I wanted to yell “Sookie!” (from the “Gilmore Girls”.) Her role in Bridesmaids was the antithesis of Sookie and yet she was equally charming. I like her.

Anyway, I was able to take Lily with me for the weekend so she could hang out with other dogs and have her own canine girl-getaway. She, too, had a good time. On the way home we stopped off in Berkeley so I could do a little shopping and the dog could get out for a jaunt through Cesar Chavez Park.

Read the rest of this entry

Ta-ta-tabbouleh

Standard

Photobucket

As I worked in the garden these past few weeks I’ve been eyeing the Italian parsley in the herb garden wondering:

a) will it completely overtake the entire garden and then my house like in that crazy sci-fi movie … can’t remember the name, but you know which one I’m talking about, the one where the ivy turns evil.
b) it’s so big and bushy, can I turn it into some kind of cool, eco-friendly afro wig and make a million bucks?
c) what possible dish could you use so much Italian parsley in one fell swoop?

The parsley seriously needed to be tamed.

Nearby is my little mint garden, which is also doing extremely well. And that’s when inspiration struck! Mint + Italian parsley = TABBOULEH!

For those unfamiliar with ta-ta-tabbouleh … it’s a delicious middle eastern salad. It’s ridiculously simple to make and oh, so flavorful! The secret is the cinnamon and allspice. Who thinks to add these to salad, right? But it totally works!

Step 1: Make your bulgur (aka cracked wheat). If you haven’t worked with bulgur before, let me assure you that it’s super easy (or I would not be using it). You don’t need much for this salad, I used 1/4 cup which was probably generous. Many recipes call for only a few tablespoons. Here’s how you make it: You rinse it a couple times with water. Drain it. Let it sit on the counter while you’re making the rest of salad, fluffing it every once in awhile with a fork. That’s it! How simple is that? I know, crazy simple!

Step 2: The basis for the salad is lots and LOTS of Italian parsley (3 part ratio = 2 huge bunches) plus mint (1 part) julienned. Add to that some chopped tomatoes, scallions or chives and your bulgur. Give it a toss.

Step 3: Next add the spices to taste: 1/4-1/2 tspn cinnamon (essential) and allspice (or Middle Eastern 7-spice). A little sea salt and cracked pepper.

Step 4: Squeeze one lemon over the top and drizzle olive oil until nicely coated. Mix.

Photobucket

This salad is so lovely and refreshing, it’s perfect for summer. And if you have some pita bread around —hoowhee—even better! I paired this salad up with some sun-dried tomato hummus, toasted pita squares and a glass of Chardonnay. I’m telling you, it was perfect!

Go put your feet up and enjoy!